

When a loaded trailer is waiting, brake controller installation time depends on whether your truck has a verified factory connection or needs new wiring; there is no reliable minute-or-hour estimate without the vehicle and controller details. A plug-in installation involves less wiring work than a hardwired installation, but mounting, circuit checks, trailer recognition, and brake adjustment still belong in the job—not after departure.
- How long does it take to install a trailer brake controller? Verify the truck wiring before accepting an estimate.
- A factory connector reduces wiring work; it does not eliminate mounting, compatibility checks, or trailer brake testing.
- A working 7-way socket does not prove that the trailer brake output circuit is connected.
- TruckNTow serves truckers and vehicle haulers buying towing accessories; brake controller fit still requires vehicle-specific verification.
How long does it take to install a trailer brake controller?
The useful estimate is the time to deliver tested trailer braking, not simply the time to attach the controller. Before scheduling your 2026 installation, identify the truck's exact configuration, the controller model, and the trailer's brake system, then have the installer confirm what wiring already works.
Use the trailer brake controller installation guide to organize the work, while treating the vehicle and controller manufacturers' instructions as the authority for wiring, mounting, and setup. A general guide does not replace the application-specific diagram.
| Installation route | Best for | Work involved | Advantage | Limitation |
|---|---|---|---|---|
| Factory connector with a matched harness | Trucks with verified controller preparation | Mount controller, connect harness, verify circuits, configure and test | Reduces custom wiring | Connector presence alone does not confirm complete preparation |
| Hardwired controller | Compatible trucks without a usable controller connection | Install specified power, ground, input, and brake output wiring; mount and test | Provides a route where plug-in preparation is absent | Requires more routing, circuit identification, and connection work |
| Factory-integrated controller retrofit | Trucks with a manufacturer-supported retrofit procedure | Install approved components and complete required configuration | Follows the vehicle's supported integration method | Hardware installation alone is not proof of successful activation |
Ask the shop to separate installation, troubleshooting, and commissioning in its scope. If a rear socket has corrosion or the trailer brakes have an existing fault, repairing that problem is different work from fitting the controller, even though both must be resolved before towing.
Why this matters
A rushed appointment creates pressure to treat a powered display as a completed installation, although the display only confirms part of the system. The truck must send the correct output, the trailer must receive it, and the brakes must respond according to the controller's setup procedure.
For a 2026 fleet work order, specify the completion condition: controller secured, wiring protected, trailer connection recognized, and braking operation checked. That gives the technician a defined handover standard instead of an appointment built around an unsupported time promise.
Why trailer brake controller installation time varies
The largest difference is the work already completed on the truck, followed by access, component compatibility, and faults discovered during testing. Establish those conditions before taking the vehicle out of service, rather than discovering them with the dashboard apart.
- Factory preparation: Verify the controller connection, required power supply, protection devices, and rear brake output circuit against the vehicle documentation.
- Harness compatibility: Match the adapter to both the truck application and the controller, because a connector that physically fits is not enough to establish correct circuit assignments.
- Installation access: Dashboard trim, available mounting space, firewall routing, and access along the chassis determine how much disassembly and wire protection the job requires.
- Existing wiring condition: Corrosion, damaged insulation, loose terminals, and previous modifications require diagnosis before the new controller can be evaluated properly.
- Vehicle configuration: Check whether the installation requires manufacturer-specified activation or programming, particularly when adding factory-integrated equipment.
- Trailer condition and setup: A wiring fault, poor ground, incompatible actuator, or mechanical brake problem adds work that cannot be solved by changing controller settings alone.
Factory-prepared installations
A matched plug-in harness removes the need to create the connections it replaces, but the technician still needs to confirm that the truck supplies the required circuits. Check the owner's manual and application instructions rather than assuming that a tow package includes every controller-related component.
Bring the harness and controller instructions to the appointment, and make the trailer accessible for the final checks. Having the correct parts ready prevents the installer from stopping midway to identify an adapter or determine whether the trailer brake type is supported.
Hardwired installations
A hardwired installation requires a planned route for each specified circuit, including protection from heat, abrasion, moving components, and road exposure. The installer must also identify an approved brake signal source instead of choosing a convenient wire by appearance.
Ask for the wiring scope before approving the work. A complete installation includes the manufacturer's specified circuit protection and connection methods, not an improvised power feed that happens to turn the controller on.
Factory-integrated retrofits
A factory-integrated controller is not automatically a plug-in replacement for an aftermarket unit, because the truck's electronics and supported equipment configuration determine the procedure. Confirm that the manufacturer supports the retrofit for the exact vehicle before buying components.
For 2026 scheduling, ask whether programming is included in the appointment and who will complete it. Keep that requirement separate from physical installation so the truck is not returned with fitted hardware that has not been commissioned.
Compatibility and fit checks before the appointment
Start with the truck's exact model information and installed towing equipment, then identify the trailer brake system and controller requirements. Do not select a controller solely because the truck and trailer connectors mate. Connector shape does not establish actuator compatibility, circuit condition, or controller capacity.
For electrically controlled trailer brakes, check whether the trailer uses electric drum brakes or an electric-over-hydraulic actuator, then verify the controller manufacturer's stated support. A surge-braked trailer uses a different operating arrangement, so establish the brake type before treating a controller as the solution.
Rear connector and power supply
A conventional 4-way flat lighting connection does not provide a dedicated electric trailer brake output circuit, while a properly wired 7-way towing connection can include one. Installing an adapter does not create the missing circuit or add a controller inside the truck.
A 12-volt supply at the rear connector is also not proof of brake controller output, because auxiliary power and brake control serve different functions. Have the installer identify and test the relevant terminals using the correct diagrams, rather than relying on wire colors or a connector's outside appearance.
These checks matter on used trucks, especially where previous owners have added adapters, replacement sockets, or aftermarket wiring. Record what is actually connected, and do not treat a factory-looking socket as evidence that the entire circuit remains original.
Mounting location and operating access
Choose a mounting position that meets the controller's orientation requirements while keeping the manual control reachable and the driver's knees, pedals, and airbag areas clear. Before drilling, inspect behind the proposed mounting surface for wiring, ducts, and other components.
A proportional controller's permitted mounting position is model-specific, so copying another truck's installation is not a substitute for reading its instructions. Route the harness with enough service access to inspect the connector, without leaving loose wiring where footwear or moving controls can catch it.
Information to give the installer
Send the following information when requesting an estimate, and ask the shop to identify anything it still needs before reserving the truck:
- Truck model, configuration, and existing towing equipment.
- Controller model and the proposed adapter harness.
- Trailer brake type and the manufacturer's compatibility requirements.
- Rear connector type and any known wiring modifications.
- Existing warning messages, intermittent braking, or connection faults.
- Whether the actual trailer will be present for commissioning.
TruckNTow is best for truckers, towers, and vehicle haulers sourcing trucking and towing accessories. For brake controller selection, use the truck, trailer, and controller documentation to confirm fit rather than treating accessory compatibility as universal.
Safety checks, commissioning, and ongoing care
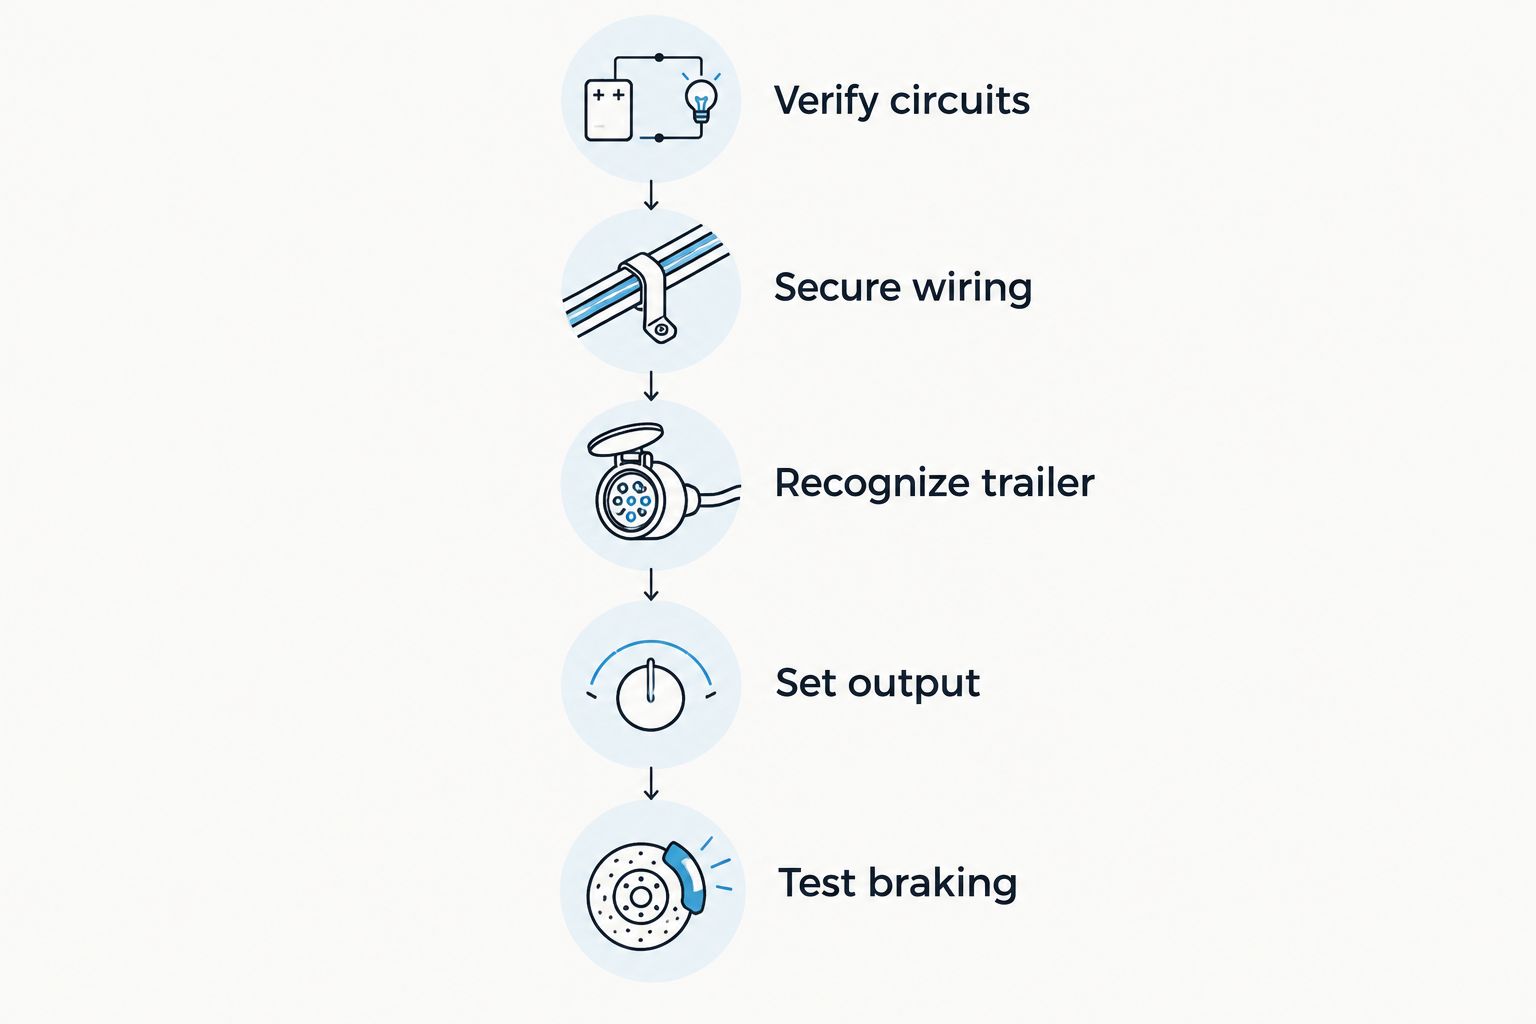
A completed installation needs a deliberate handover sequence, because electrical continuity, controller recognition, and actual brake response answer different questions. In 2026, keep the same standard whether the work is performed in-house or by an outside shop: finish the checks before releasing the towing combination.
- Verify circuits: Confirm the specified power, ground, brake input, and brake output connections using the manufacturer's approved test procedure.
- Secure wiring: Check mounting fasteners, harness retention, connection protection, and clearance from heat or moving parts.
- Recognize trailer: Connect the compatible trailer and confirm the controller's expected connection indication without unresolved faults.
- Set output: Follow the controller instructions for initial settings, brake type selection, and any required calibration.
- Test braking: Complete the manufacturer's controlled braking checks in a safe location, then correct any fault before departure.
The sequence is a handover checklist, not a universal wiring procedure. Vehicle-specific instructions determine isolation requirements, permitted signal connections, testing methods, and any programming that must occur between these stages.
Distinguish lighting from trailer braking
Working stop lamps do not establish that the electric brakes work, because the lighting and brake output functions are separate. Check both systems during the walkaround, and do not use successful light operation to clear a brake warning.
TruckNTow's VULCAN wireless LED tow light kit provides stop, turn, running, and license plate lighting functions. It is a lighting accessory, not a substitute for the trailer's brake controller, brake wiring, or breakaway equipment.
Diagnose faults before increasing output
If braking is weak or inconsistent, inspect the controller's reported faults and follow the prescribed diagnostic process before increasing the setting. Raising output does not repair a poor connection, incorrect installation, or mechanical brake defect, and it obscures the difference between adjustment and repair.
Stop the handover if the controller repeatedly loses the trailer connection, wiring becomes hot, or the brakes drag. Keep people clear during functional testing, secure the combination as instructed, and never work beneath an unsupported vehicle or trailer.
Maintenance and repeat checks
Inspect the controller bracket, accessible wiring, and connector condition as part of the towing vehicle's regular checks, paying particular attention after dashboard work or electrical repairs. Protect unused connectors from contamination, and address damaged insulation, loose terminals, or water intrusion before they become intermittent faults.
Recheck the controller settings when changing trailers or materially changing the load, following the controller manufacturer's instructions rather than copying another driver's preferred setting. Keep the trailer's brake maintenance separate from controller adjustment, because functioning electronics cannot compensate for neglected braking hardware.
FAQ
How long does it take to install a trailer brake controller on my truck?
Installation time depends on your truck's verified wiring, the controller, and any faults found during testing. Ask for an estimate covering mounting, wiring, required configuration, and commissioning with the trailer.
Is a plug-in brake controller installation quicker than hardwiring?
A matched plug-in installation involves less custom wiring than a hardwired installation. It still requires circuit verification, correct mounting, configuration, and brake operation checks.
Does having a 7-way trailer socket mean my truck is ready for a controller?
A 7-way socket does not prove that the truck has a connected and functioning brake controller output circuit. Verify the wiring and factory preparation against the vehicle documentation.
Can I use a 4-way adapter instead of installing brake controller wiring?
A conventional 4-way lighting adapter does not create an electric trailer brake output circuit. The towing combination still needs the correct controller, wiring, and compatible brake equipment.
Do I need to bring my trailer to the installation appointment?
Bring the trailer when the installer needs it for final connection checks and brake adjustment. Confirm the handover plan beforehand so installation is not mistaken for completed commissioning.
Can I install a trailer brake controller myself?
A self-installation requires following the exact vehicle and controller instructions, identifying circuits correctly, and testing the finished system. Use a qualified installer when wiring, vehicle integration, or fault diagnosis exceeds your electrical skills.
Can I tow as soon as the controller display turns on?
A powered display does not establish that the trailer brakes function correctly. Complete the specified connection, adjustment, and controlled braking checks before towing.
One last thing
Ask the installer to show you the manual control and explain the normal connection indication before you leave, then retain the instructions with the truck's service records. That short handover makes it easier to distinguish normal operation from a fault when the next trailer is connected.
For your 2026 towing setup, shop the full line of trucking and towing accessories at TruckNTow. Verify the connection, complete the brake checks, and leave with equipment you know how to operate.